I’ve been playing around with different lighting scenarios at my home office, mostly with available light, but also with a “home depot” DIY light kit I put together. This a screen shot of what an order for 2 lights would look like. The bulbs are “daylight” to complement a window. If you had no window you would be looking for “warmer” light bulbs, so-call tungsten lighting. 
I have south facing windows with tons of light in my office, which can be good and not so good, and here’s why:
- In general, it’s best to have complete control over your lighting situation. But, if you’re a DIY-er you will want to work with available light and learn what to look out for, to make sure you have matching shots when you edit.
- Shoot the time of day there’s no direct sunlight into your window. Shadows on walls move fast, you won’t be able to keep up with shooting.
- But even indirect sunlight can be tricky. The light in a room will look different on a rainy day from an overcast day.
- If the light coming through the window is too bright, use a bed sheet, or blinds to control it.
Below a few floor plans and matching stills from iPhone video I shot in my office:
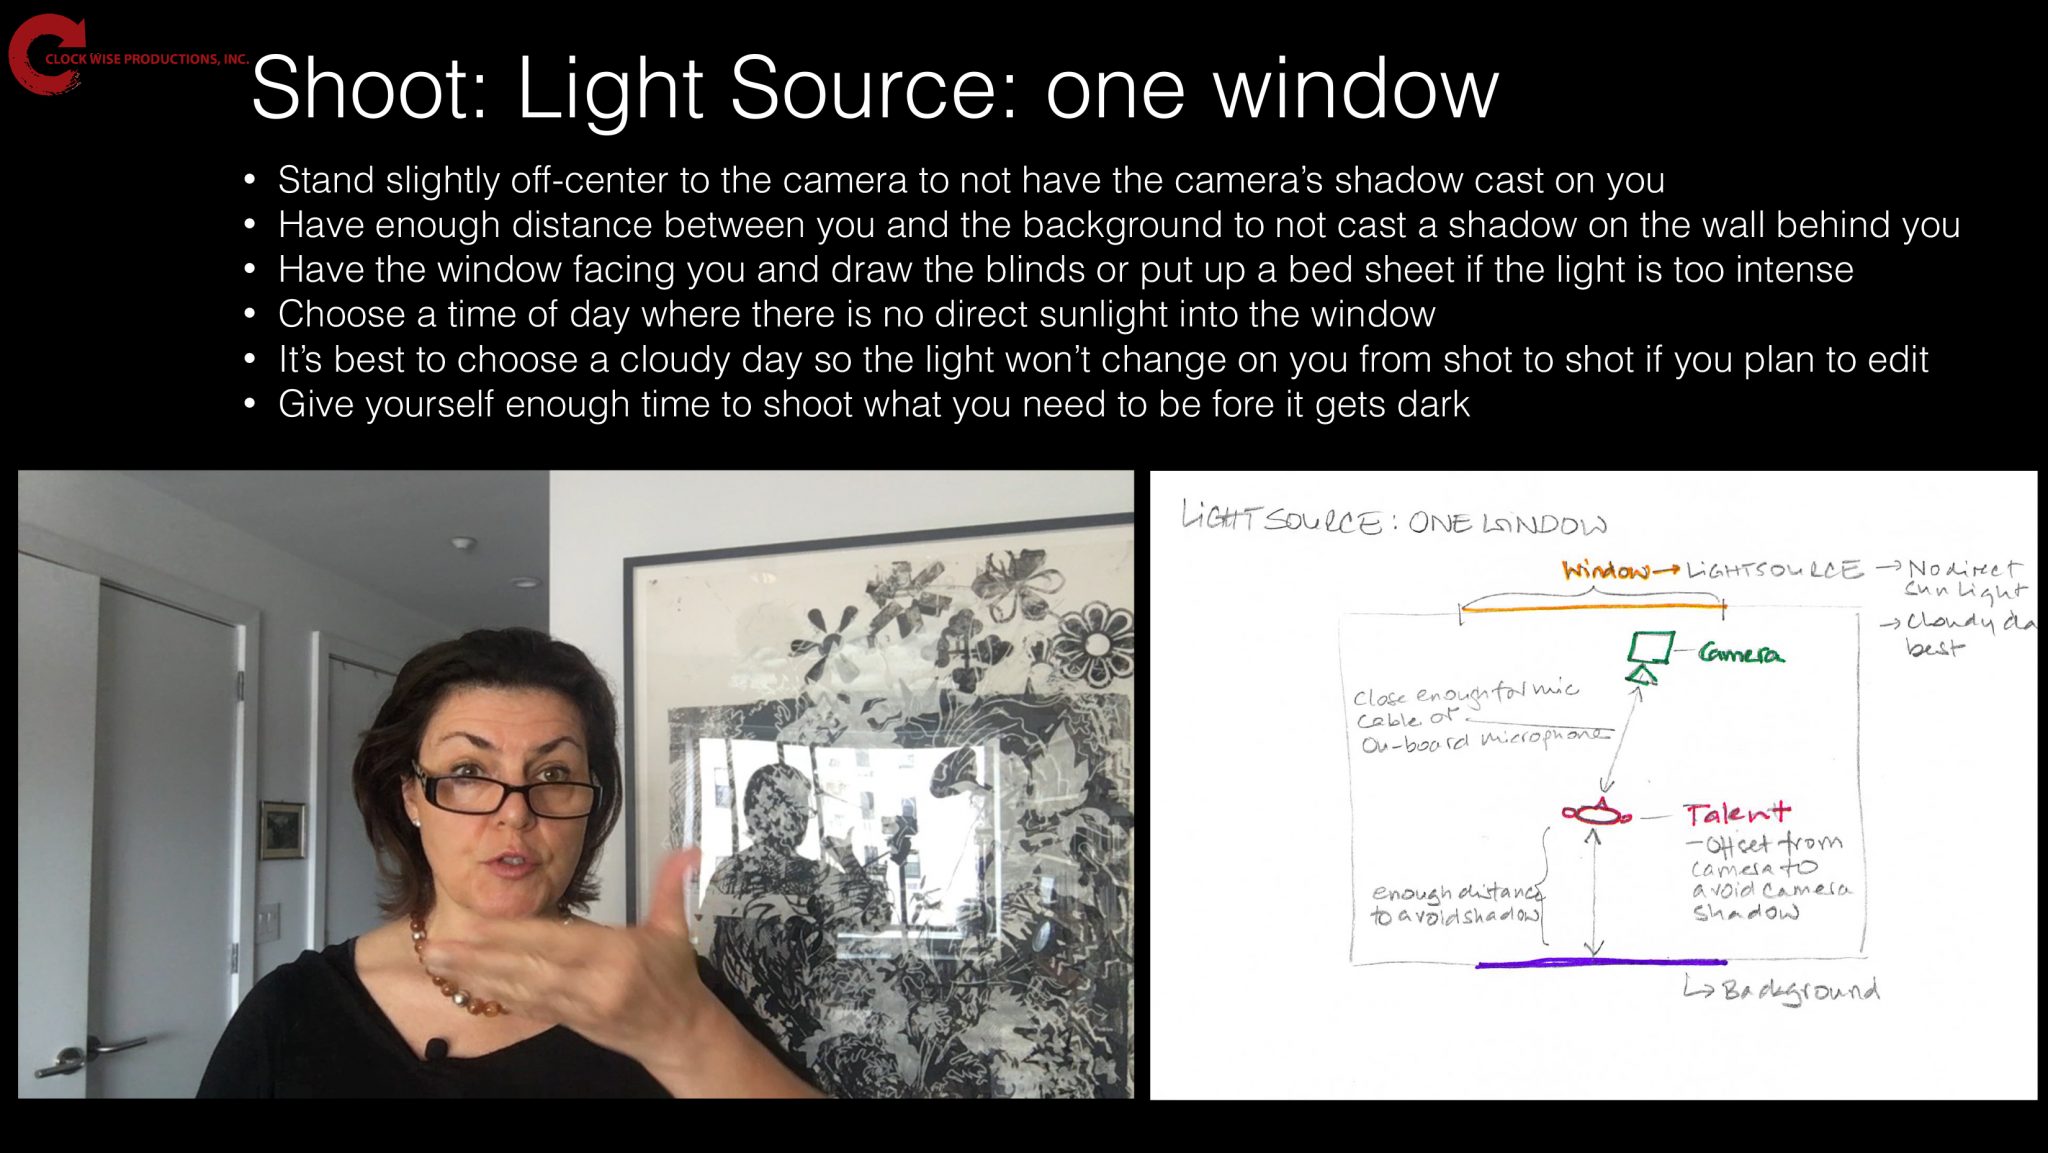
I like this one; the indirect light on a sunny day coming through my window is enough to light my face. The left side (facing the window slightly) has a nice light on it and the right side is a bit shadier for a good contrast. (Now have to figure out an angle that removes the glare from the window in the art work behind me…).
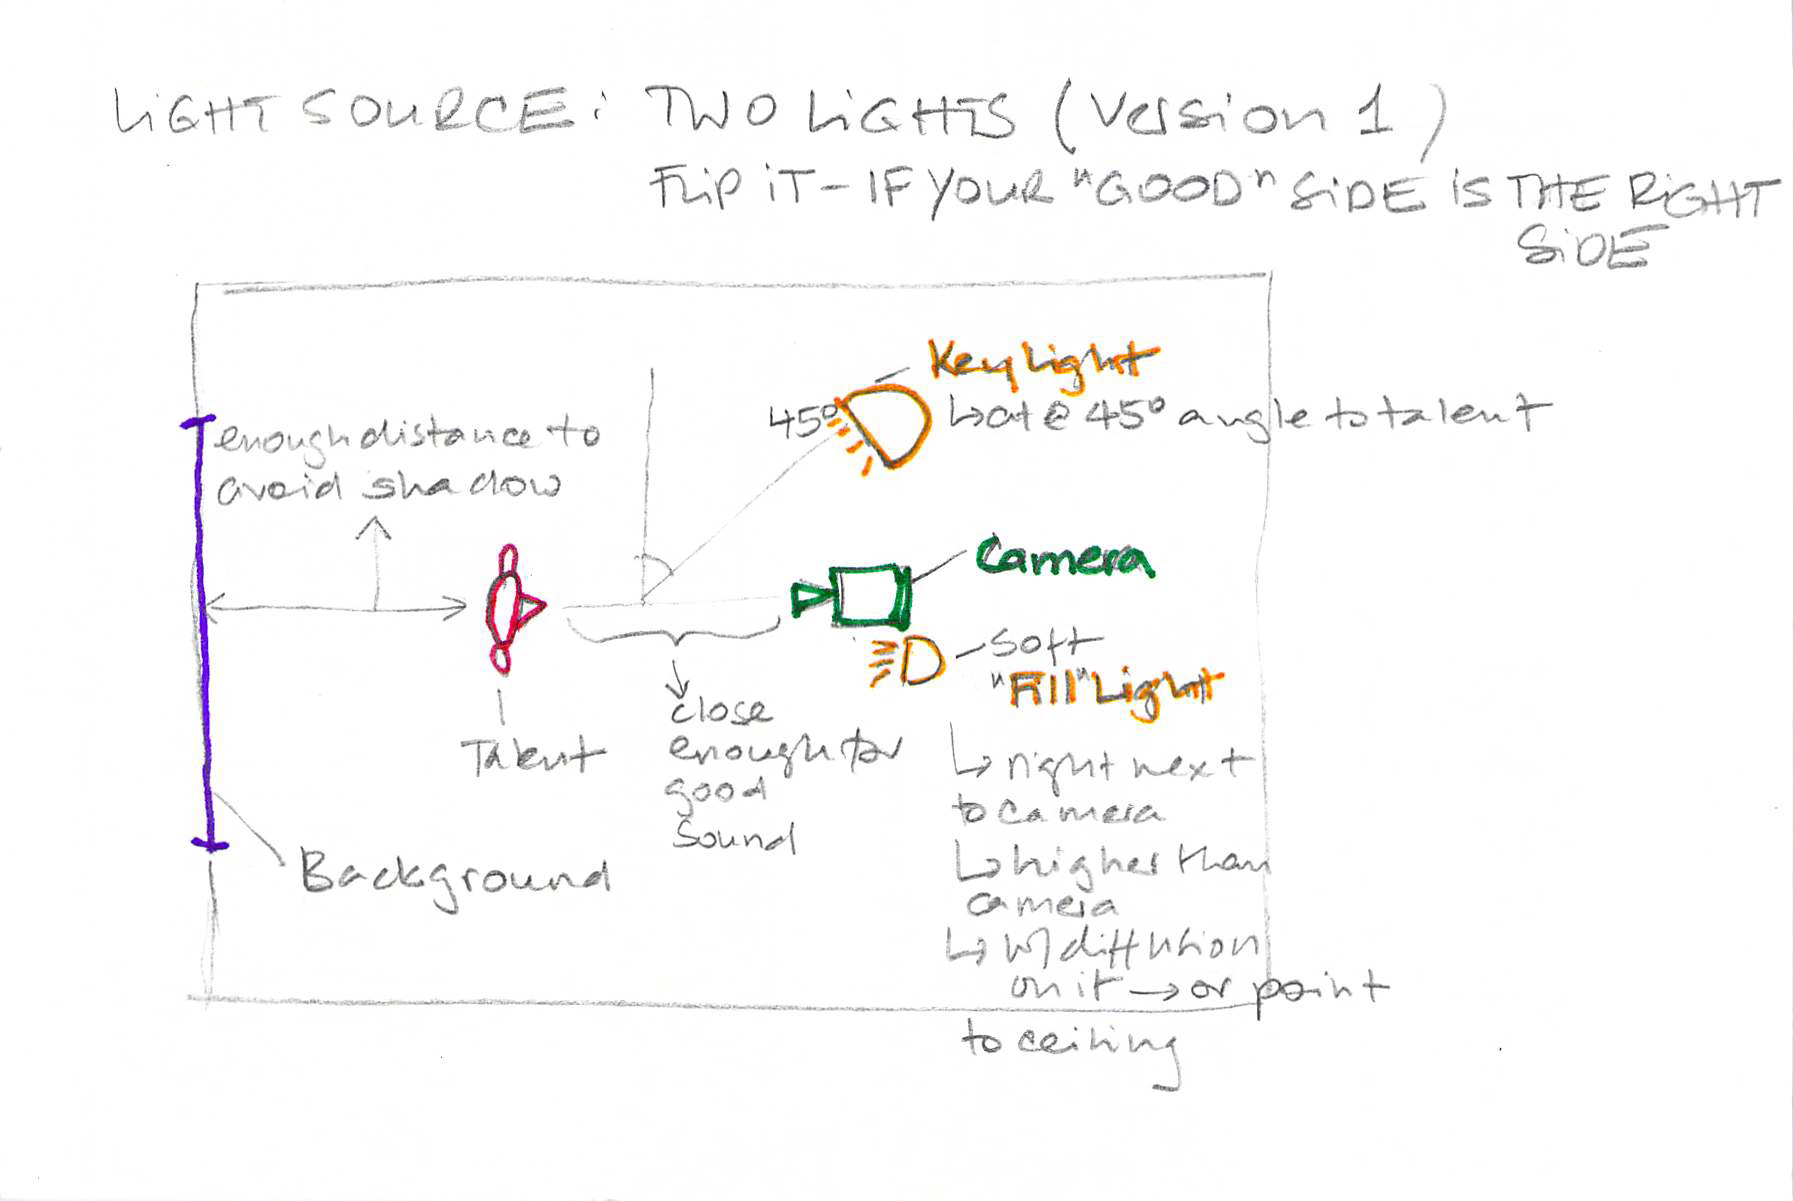
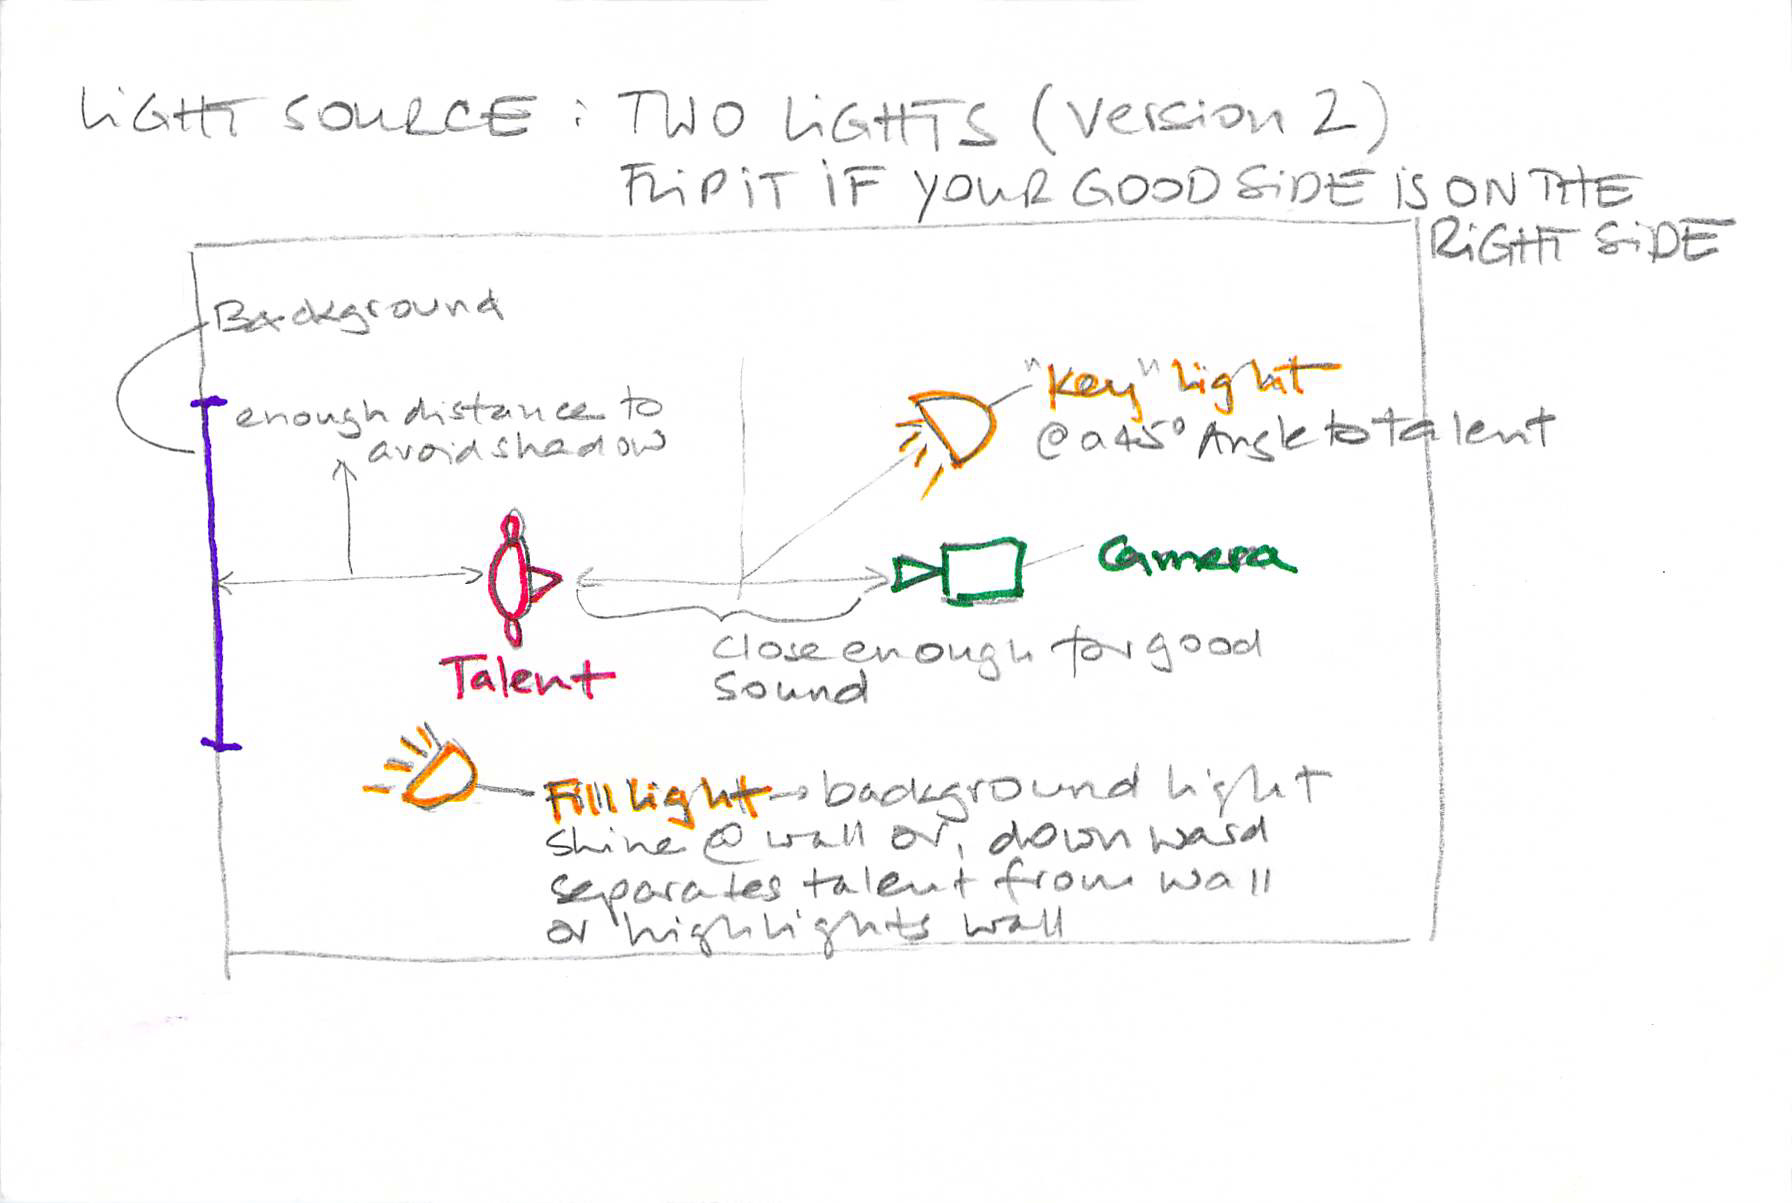
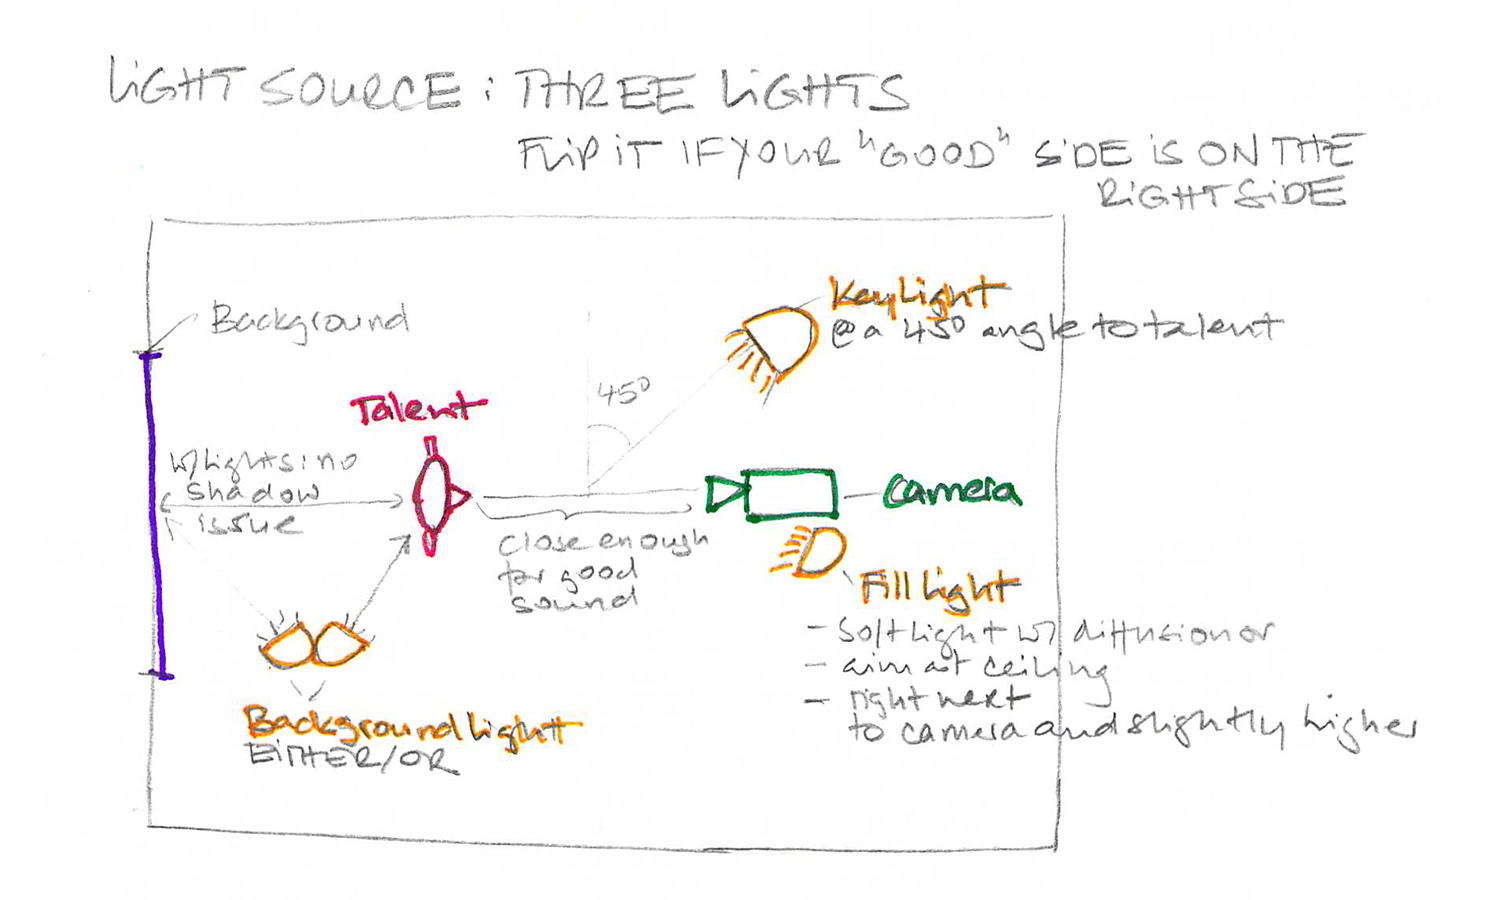
If we add one, two and three lights to the set up, this is how the floor plans would look like: