This post will run down what you need to know when it comes to creating a video for your small business, whether you’ll be behind, or in front of the camera, or both!
It’s a lot of information, and we’ve broken it down into chapters so you can feel aware and prepared going into your DIY shoot.
Here’s what we’ll cover:
- Choosing the Right Location for Your Shoot
- What Camera Should You Use for DIY Video
- Accessorizing for a Smart Phone Shoot
- How to Light a Talking Head Shoot
- A Bit More on Backgrounds
- What to Wear – or not Wear – on Camera
- Framing a Talking-Head Shoot
- Shooting a Talking-Head Video
- Advice on Shooting B-Roll
So, let’s get started!
1. CHOOSING THE RIGHT LOCATION FOR YOUR SHOOT
Looking for, and finding a good spot to shoot can make or break the quality look and feel you want to portray of yourself and your company.
Modeled after the steps that a location scout will go through on a professional video shoot, We’ve created this simplified checklist for finding your best location.
We’ll go deeper into some of the steps below (background, lighting) in this guide, but if you don’t start off with a decent location then you’ll be setting yourself up for a more difficult experience than necessary.
Remember to ask:
- Do I have permission to shoot in this location?
If you’re using someone else’s space, we recommend getting their permission in writing – even if it’s just in an email. If it’s your home or office, do you have general liability insurance, or a homeowner’s policy, in case someone helping you hurts themselves? (Note: This holds true if you have a bigger shoot, not if it’s yourself and a smart phone).
- What is the background you’ll be in front of?
iPhones, and most non-professional cameras will not allow you to throw the background out of focus. Keep to a neutral, non-distracting background. A solidly colored wall is probably your best friend.
- What is the lighting situation?
If there is a window does it have direct sunlight? If so: what hours of the day? Can you shoot what you need to shoot while there is no direct sunlight? Are there shades that can control the outside light? If there is no window, do you have a few lamps that you can use to adjust the lighting?
- What is the noise level in this room?
Listen for or ask about: air conditioning; heater noise; street noise; hallway noise; elevator “ding”; thin walls to neighbors.
- How big is the room?
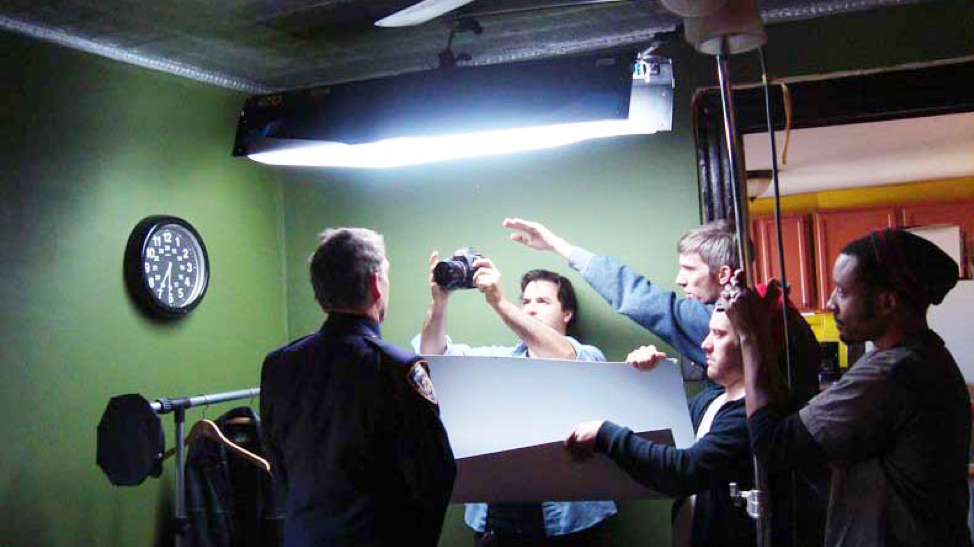
Do you get enough distance in length between the background and yourself, and between the camera and yourself, so you won’t cast a shadow on the wall and the camera won’t cast a shadow on you? Do I have enough width to get a clean background, and not see other walls in the shot?
- Can you set yourself and the camera up such that you are close enough to camera for good sound?
If you’re working with a larger distance between you and the camera then you may need to invest in microphone equipment. We’ll talk about that in the equipment section of this guide.
- Do you have enough time to do what you need to do?
One page of traditional script format (one audio and one video column) typically equals one minute of video, once it’s all edited. When planning on how long your shooting day will take, a good rule of thumb is to give yourself an hour per page. Then add an hour for set up at the beginning of the shoot and an additional 30 minutes for backing up footage and breaking down the equipment at the end. (Note: this holds true for a shoot that goes beyond just you and your smart phone)
- Can the room handle all your equipment?
Are there enough outlets and is there enough power for all the ‘stuff’ you’re plugging in? Do you need to bring extension cords?
2. WHAT CAMERA SHOULD YOU USE FOR DIY VIDEO?
We once produced and directed a video to rave reviews from the agency and the clients. Everyone especially liked the camera work, which was done by the amazingly talented Peter Mariuzza. A fellow producer wanted to know which camera and lenses Peter had used. We dutifully answered the question, but we both had the same reaction to the question: It’s not about WHAT you shoot with, but about HOW you use the equipment.
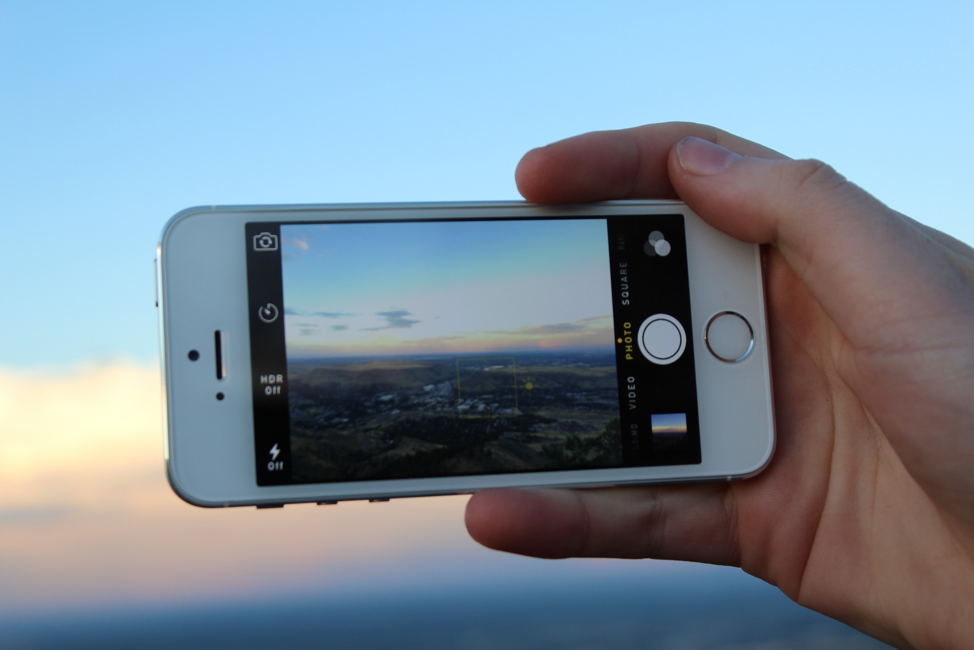
If you’re a true do-it-yourselfer, start with your smart phone.
They have great video cameras today, even in “selfie” mode, and if your objective is a video introducing you, as the face of your company, it might work just fine for you and your budget. Make sure to keep it short and simple.
If you shoot close enough, the built-in microphone is probably good enough (but do make sure to record in a quiet environment to avoid audio headaches).
Note: If you start geeking out on equipment too early, chances are you’re not focusing on content and how to engage your audience. AND, you’ll end up buying twice after you figure out what you REALLY need.
If you are looking for some good tools to make your video experience a little easier, there are accessories that you can use with your phone, that won’t break the bank.
3. ACCESSORIZING FOR A SMART PHONE SHOOT
There are a gazillion gizmos out there to stabilize, strap, and mount your phone. And there are equally as many apps to enhance your in-phone camera, and help you edit, distort, and upload video. If you have extra time: you can really have a lot of fun trying out different video software.
But for shooting a straight into camera talking-head, some b-roll footage, or an interview, the camera itself is just fine.
We’re going to stick to the basics and focus on getting you something you can achieve in a timely manner and use without years of experience in video production!
First and foremost, make sure you have enough memory on your smart phone to shoot!
For an iPhone, you check this under Settings => Photos & Camera => Record Video and it will tell you your recording format choices and how much memory is being used in the process. We recommend you shoot a test at “1080p HD and 30 fps” and see how your memory stacks up.
If you do NOT have enough memory for a few 30 – 60 second video clips, borrow a phone, before you spend ANY money.
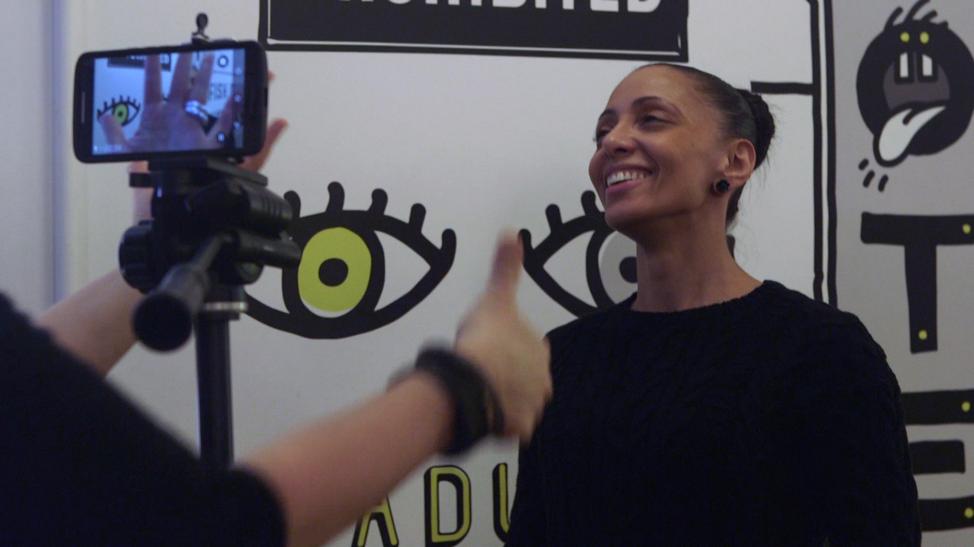
In our mind, there are two approaches to shooting with a smart phone camera: either, you and your phone OR you, your friend and your phone.
However, if you have the means accessories (even a simple tripod) can be very helpful. Here are a handful of simple items that you can add to your video shoot without breaking the bank. Note: These items are suggestions and not professional grade. They are adequate however for staring out and tinkering.
- An adjustable phone grip and tripod with carry bag.
These are probably two of the most useful tools for making sure your shots stay consistent and look professional. For the tripod, make sure the legs extend high enough for you to be eye level with the lens of your smart phone and look to find the sweet spot between sturdy and bulky. If it has a “head” make sure it pans and tilts smoothly and has a watermark for leveling. - A lavaliere microphone.
If you are working with distance from your camera for your ideal shot then you’ll definitely want to get a microphone like this to keep the quality of your audio. Make sure you get one with a long enough cable to reach from your tripod to wherever you will be. - A light kit.
If you have tons of daylight in your shooting space you don’t need a light, because nothing strong enough to counter or enhance daylight you’d want to carry, store, nor pay for.
And here are some things that fall outside physical ‘equipment’, but you’ll still likely want to have at the ready for your shoot:
- Your script
- Post-it’s and a sharpie
- One trusting friend, or family member, who isn’t prone to giggle-fits
- A rubbery protective cover for your phone because you will (and yes, you will!) forget that you’re tethered to the camera via your microphone, and walk away, and pull the entire enchilada with you, so PROTECT YOUR PHONE
- A Dropbox account (or other cloud-based platform) that automatically syncs files with your phone
- A good internet connection where you shoot or shortly thereafter to back up files
- Time and patience
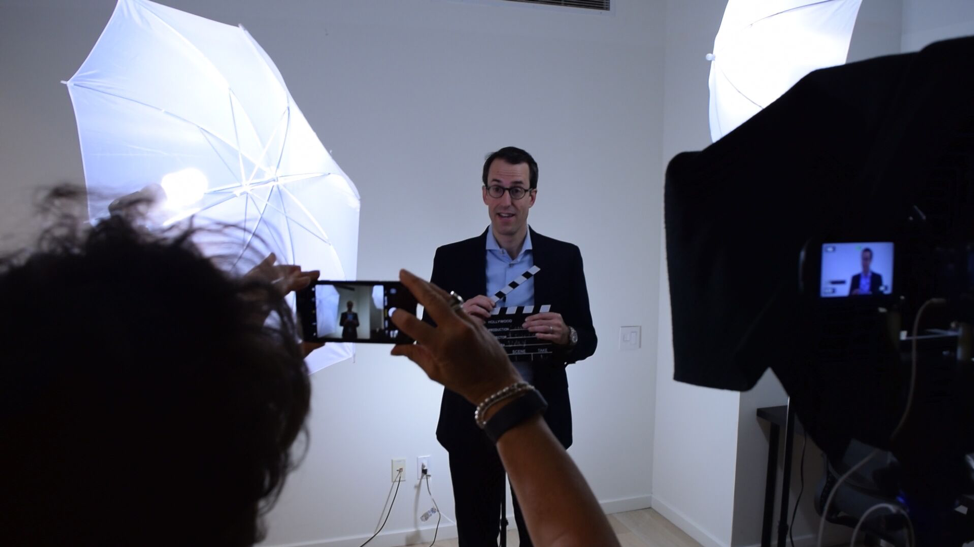
4. HOW TO LIGHT A “TALKING-HEAD” SHOOT
For Clock Wise Productions, we often shoot in Nina’s home office, mostly with available light from south facing windows with tons of light. Sometimes tons of natural light is great, but it can also lead to some complications.
In general, it’s best to have complete control over your lighting situation so that you can have matching shots when you edit later.
If you are working with light from a window, you may have to redo a section of your script if the lighting in the room changes.
We recommend shooting during the time of day when there’s no direct sunlight into your window.
Shadows on walls move fast, you won’t be able to keep up with shooting. That being said, even indirect sunlight can be tricky. The light in a room will look different on a rainy day from an overcast day.
Here’s a quick trick: if the light coming through the window is too bright, use a bed sheet, or blinds to diffuse it and gain more control.
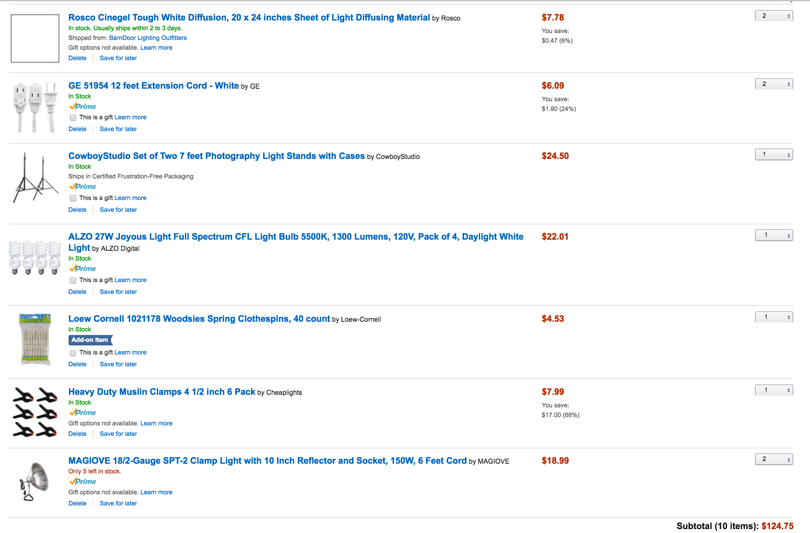
Sometimes we use a DIY light kit that we put together when we want more control over the light situation, or when the weather isn’t cooperating.
This is a screen shot of what an order for 2 lights would look like. The bulbs are “daylight” to complement a window. If you have no window you would be looking for “warmer” light bulbs, called tungsten.
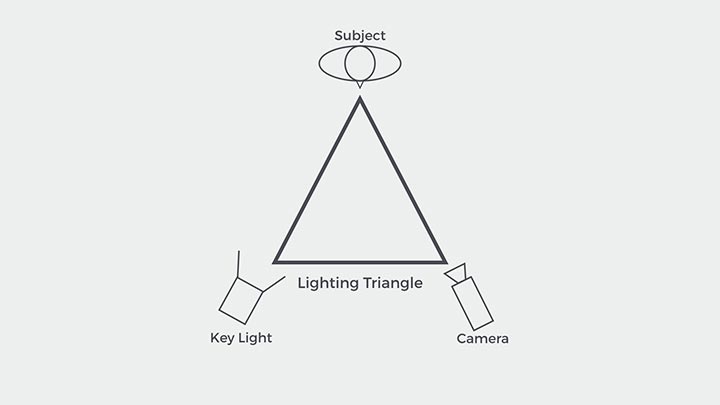
Below a floor plan for a one-light source lighting set up:
5. A BIT MORE ON BACKGROUNDS

To reiterate: It is important to shoot in front of a neutral background. You want the viewer to pay attention to you, not what’s going on behind you. The picture above might look cool, but while Samir was talking viewers got distracted by the lively ongoing traffic behind him.
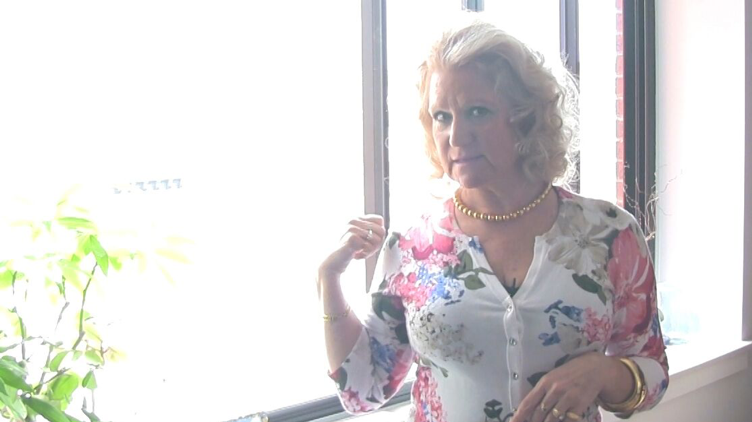
If you have the option, shooting with a window can be a great light source, but you want that light hitting the speaker’s face, not her back. Daylight behind the speaker will wash out , or overpower everything else.
6. WHAT TO WEAR – OR NOT TO WEAR – ON CAMERA
If you’re selling a service or representing your business in front of a camera, then you definitely want to show off your best self.
Here some wardrobe tips we send out to our corporate types (as we, lovingly, call them), that you can draw from for your shoot:
- Bring more than one outfit ‐ especially tops, and ties where appropriate, so we have some choices.
- The camera picks up certain colors and patterns better than others: Colors that work well are beige, blue/dark blue, gray, brown, purple, green, and pin
- Wear a shirt that a microphone can be attached to
- Avoid stark white or bright yellow shirts that tend to reflect light and be too vivid on camera
- Avoid black suits, which tend to diminish your appearance because they absorb too much light
- Avoid fabrics with complicated patterns such as checks, tight/close stripes, herringbones, tweeds, and loud plaids. Fabrics of this design tend to strobe on camera
- Avoid neckties with bold, tightly designed patterns, including plaids, polka dots, and shiny fabrics. They too will flutter on camera
- Avoid jewelry that rattles, or clanks, and might make noise
- Avoid any logos and references to brands, including sports teams, locations, films, etc.
- Style your hair off your face to avoid shadows
- Choose a color you know complements your complexion.
- Stay with solids – can’t go wrong there
- Avoid ruffled or asymmetric tops
- Look at your outfit from waist up – that’s what you’ll most likely will work with, don’t worry about shoes
- Avoid scarves (I’m a HUGE fan of scarves, but for interviews or talking-head shots I take them off) – they are often a continuity nightmare and jump cuts will look awkward.
The bottom line is: “less is more” and “keep it simple”.
It’s also preferable to have people stand and not sit in front of the camera – if at all feasible. Not only does it help your posture, standing also makes your clothes look better on camera: less bunching and longer lines.
7. FRAMING A TALKING-HEAD SHOT
Video is a multi-layered medium. It is brilliant at conveying messaging between the lines and can pull at your emotions without you even being aware. A master craftsman knows how to play to those emotions setting up a scene on-camera. For the rest of us, we want to be careful, not to convey unintentional information.
Here’s what to keep in mind while framing your perfect shot.
- Video is (for now) a horizontal medium, so always shoot horizontal!
Know that if you hold your smart phone in a vertical position, start recording, and then turn it horizontal, the phone will continue shooting in vertical mode. Always start and stay in horizontal mode. - Look into the camera, or just off camera at an interviewer, but do not (ever) shift your eye line between the lens and an off-camera person, or cheat sheet or prompter.
If there is one advice only, this would be the most important one get right in order to look trustworthy. Eyes on ONE thing, period. - Check if the lens of your phone is on the same height as your eye line.
If it’s too high, it makes you look meek. If it’s too low, it gives you a double chin and makes you look intimidating. - Check what is inside the frame.
You can cut off the top of your head but be sure to leave enough space at the bottom for closed captions and graphics (never frame a shot to be right on your chin, go to at least mid-chest). - Put yourself slightly off center in the frame.
Many might think that you would want to keep yourself front and center, but off to the side is a more pleasing composition. - Make sure the light source is behind the camera.
If there is a window in the room, you should be facing it – don’t have it behind you or the background light will make editing a nightmare. It looks even better if you turn on a 30-degree angle and have the light source hit your face halfway from the front and side. Definitely, don’t stand under a headlight – it will cause shadows under your eyes and nose. - If you’re using a ‘natural’ background, make sure there’s nothing weird in the shot.
The last thing you want is a plant that appears to be growing out of your head or a book shelf with distracting book titles.
8. SHOOTING A TALKING-HEAD VIDEO
When it comes to shooting a DIY video, patience is necessary. Allow extra time for trial and error (and if you don’t have that time – consider hiring a professional).
Follow these simple steps for a successful talking-head video shoot:
- Err on the side of authenticity and a longer natural shoot.
Even with a great script, rather than a fully scripted and prompted one or a stiff-from-memory-delivery. - This might sound basic but, don’t forget to hit record!
I just recently did a GREAT shoot, only to realize that I never recorded it. - Talk slowly and be aware of your filler words.
I tend to go nuts on “ahems”… a nightmare to edit and tedious for the listener. - Record a first take and then immediately watch to make sure everything looks and sounds great.
This will give you a chance to fix anything before you sink too much time into your shooting. - Between takes turn the recorder off and back on again it.
Doing this will make finding stuff easier later while your editing, rather than having to slosh through a massively long video clip. - Also, if you take notes (and I suggest you take notes!), hold up a post-it with consecutive numbers for each take, or clip.
Write down which takes are the best and refer to the numbers on the post-its – this will make editing later so much easier. Especially, if you have an editor. It will save you TONS of money if the editor can go directly to the “good” takes and they are easily identifiable. - When you’re done with your take, smile and look into the lens for a few seconds.
You need a bit of ‘extra’ at the end to give the editor a chance for a clean cut to make you look good. - Upload your clips immediately after shooting.
I use airdrop – which is much faster than uploading to Dropbox, Google Drive, or iCloud.
9. ADVICE ON SHOOTING B-ROLL
If you are an advanced editor, or have someone edit for you, it’s great to have b-roll to break up the talking-head shoot and visualize what you are talking about.
B-Roll Planning:
- Plan out what you will need to capture to underscore what you are saying – it will save you tons of time shooting, and later during editing you will not have to sift through tons of material. When we have the luxury, we actually don’t shoot b-roll until we have laid down the narration of the talking-head content, so we exactly know what we need to cover
- Having said that: Shoot enough footage to have choices. Sometimes things don’t match during editing, or you need to find more stuff to cover up a “hiccup” on your talking-head delivery you didn’t anticipate
B-Roll Shooting:
- Don’t run around crazy with the camera – let the action unfold IN THE CAMERA – you just capture it with a steady hand
- If you can’t see someone’s pupils you’re not close enough – what we mean to say, is: don’t be afraid to go in close and get an (emotional) reaction!
- It’s fine to have a wide “establishing shot” in the beginning, but after that close in on small moments, details and quick “bites” that convey the story, flavor, punch-line, etc. Consider that your social media video or vlog will only run for a few seconds – max a minute or two – and you need small clips to underscore what you are saying. Apart from the fact, that nothing is more boring than an endless wide-shot of some event without any of the details that make it interesting
- If you are filming with people, get their permission to film them in writing and USE THE VIDEO in whatever capacity you see fit. That’s hugely important – even (and especially) for employees. There’s a myriad of reasons why people change their mind, AND consider, that they might not always be your employees
There are many variables to any shoot. If you’re starting out with DIY video marketing, keep it simple and short. Give yourself time to try out what works for you and what doesn’t.
If there’s anything else you’d like to add to these lists, let me know! I’d love to hear your comments.
Happy (video) shooting!